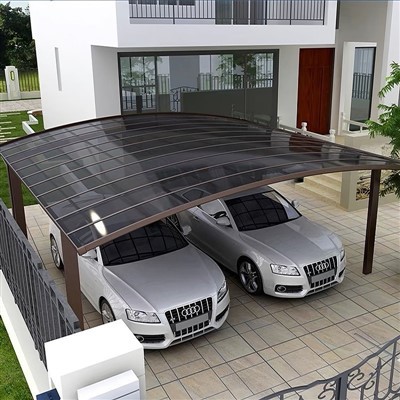

Installing a polycarbonate porch canopy on a stone porch can significantly enhance the functionality and aesthetic appeal of your outdoor space. As a supplier of Polycarbonate Porch Canopy, I have witnessed firsthand the numerous benefits that these canopies offer. In this blog post, I will guide you through the step-by-step process of installing a polycarbonate porch canopy on a stone porch, providing you with valuable insights and tips along the way.
Step 1: Planning and Preparation
Before you begin the installation process, it is crucial to carefully plan and prepare for the project. Start by measuring the area where you intend to install the canopy. Ensure that you have accurate measurements of the length, width, and height of the porch. This will help you determine the appropriate size and style of the polycarbonate canopy that will best suit your needs.
Next, consider the design and style of the canopy. Polycarbonate canopies come in a variety of shapes, sizes, and colors, allowing you to choose one that complements the architecture and aesthetic of your home. You may also want to consider additional features such as lighting, ventilation, or decorative elements to enhance the functionality and appearance of the canopy.
Once you have selected the appropriate canopy, gather all the necessary tools and materials. You will typically need a drill, screws, a level, a measuring tape, a saw, and a ladder. Additionally, make sure you have the polycarbonate panels, frame components, and any other accessories that are included with the canopy kit.
Step 2: Marking and Mounting the Frame
The first step in installing the polycarbonate porch canopy is to mark the location where the frame will be mounted on the stone porch. Use a measuring tape and a level to ensure that the markings are straight and level. Once you have marked the locations, drill holes into the stone using a masonry drill bit. Make sure the holes are deep enough to accommodate the screws that will be used to secure the frame.
After drilling the holes, insert the wall plugs into the holes. Wall plugs are used to provide a secure anchor for the screws in the stone. Once the wall plugs are in place, attach the frame components to the wall using the screws. Make sure the frame is level and securely fastened to the wall.
Step 3: Installing the Polycarbonate Panels
Once the frame is securely mounted on the stone porch, it is time to install the polycarbonate panels. Start by placing the panels on the frame, aligning them with the edges of the frame. Make sure the panels are properly seated and that there are no gaps between the panels.
Next, use the provided screws or clips to secure the panels to the frame. Make sure the screws or clips are tightened securely, but not too tightly, as this can cause the panels to crack or break. It is also important to leave a small gap between the panels to allow for expansion and contraction due to temperature changes.
Step 4: Adding Finishing Touches
After the polycarbonate panels are installed, you can add some finishing touches to enhance the appearance and functionality of the canopy. You may want to install a trim or molding around the edges of the canopy to give it a more finished look. You can also add lighting fixtures or ventilation fans to the canopy to provide additional comfort and convenience.
Step 5: Maintenance and Care
Once the polycarbonate porch canopy is installed, it is important to maintain and care for it properly to ensure its longevity and performance. Regularly clean the canopy with a mild soap and water solution to remove dirt, debris, and stains. Avoid using abrasive cleaners or tools, as these can scratch or damage the polycarbonate panels.
Inspect the canopy regularly for any signs of damage or wear. If you notice any cracks, holes, or other issues, repair them as soon as possible to prevent further damage. You may also want to consider applying a protective coating to the polycarbonate panels to help prevent UV damage and prolong their lifespan.
Conclusion
Installing a polycarbonate porch canopy on a stone porch is a relatively straightforward process that can significantly enhance the functionality and aesthetic appeal of your outdoor space. By following the steps outlined in this blog post and using the right tools and materials, you can install a high-quality polycarbonate canopy that will provide years of enjoyment and protection.
If you are interested in purchasing a Polycarbonate Porch Canopy, Polycarbonate Canopy Roof, or Storefront Rain Shelter, please feel free to contact us for more information. Our team of experts is available to assist you with your purchase and provide you with the support and guidance you need to ensure a successful installation.


References
- Manufacturer's installation instructions for polycarbonate porch canopies.
- DIY home improvement guides and resources.
- Online forums and communities for porch and patio projects.